
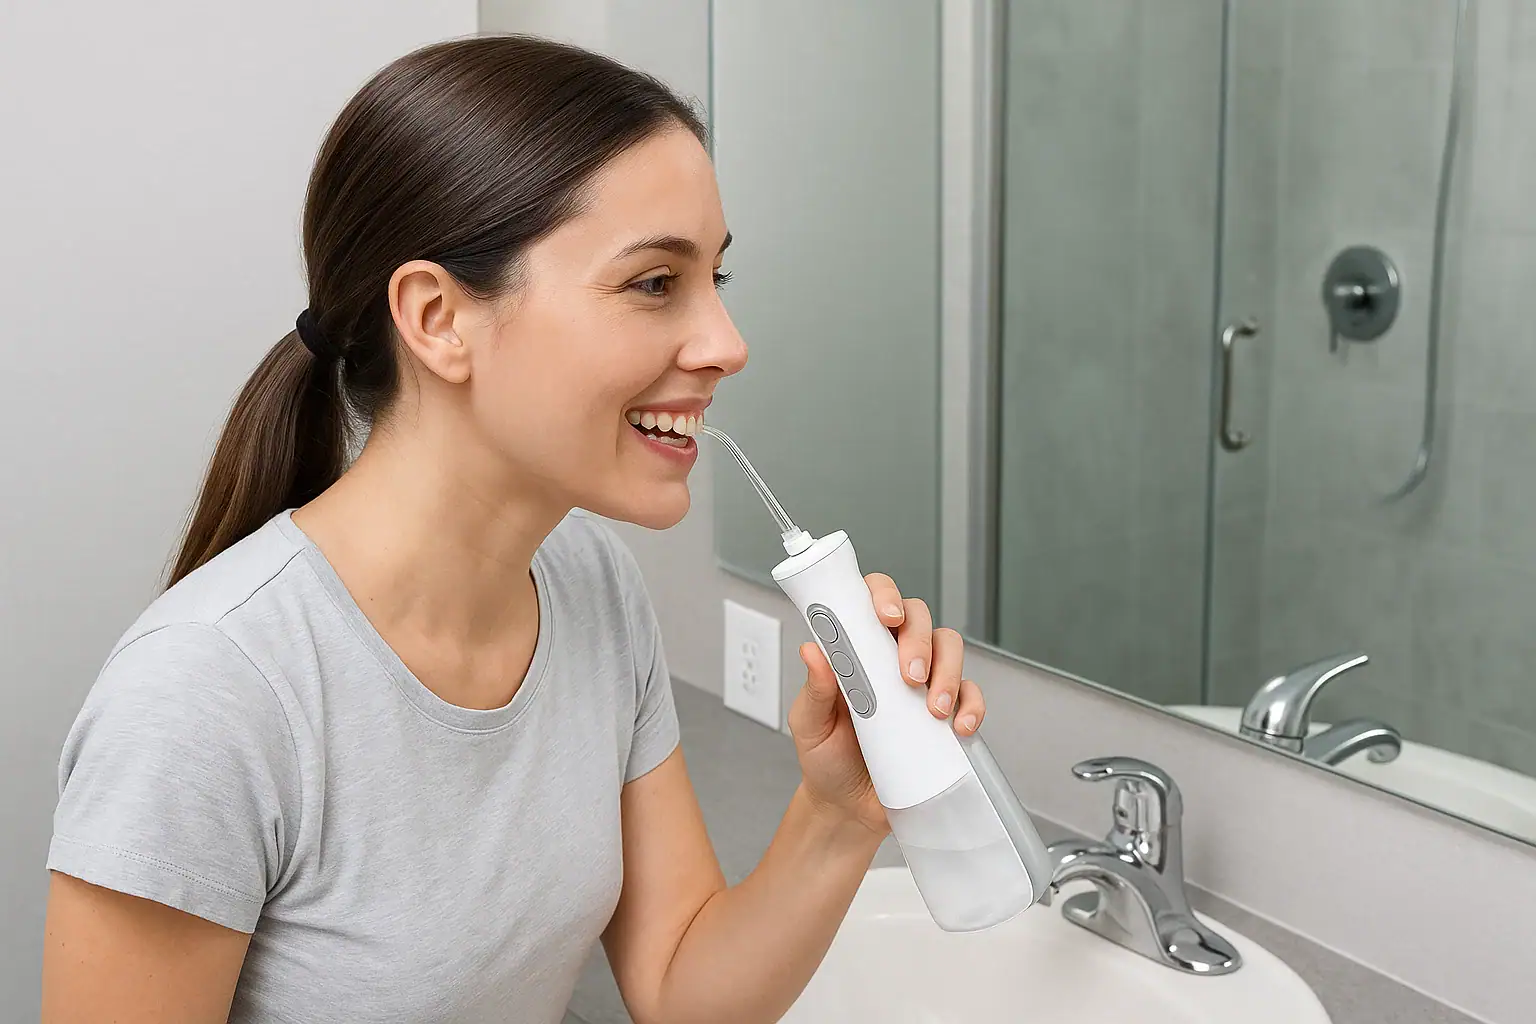
A Waterpik is a water flosser, and the technique is fixed: fill the reservoir with warm water, set the pressure low, put the tip in your mouth before switching the unit on, then trace the gumline at about 90 degrees, pausing between teeth. A full session empties the reservoir in roughly one to two minutes, once a day. In a 28-day randomised trial of 105 subjects, daily irrigation added to manual or sonic brushing reduced the bleeding index significantly more than brushing plus string floss at both day 14 and day 28 (PubMed 16305005). Tips are replaced every three to six months.
- 01Sequence matters more than pressure: tip in the mouth first, then power on, leaning over the sink and working back to front for one to two minutes.
- 02Bleeding is the outcome with the clearest data. Across 105 randomised subjects over 28 days, both irrigation groups beat brushing plus floss on the bleeding index at day 14 and day 28, while plaque differences were smaller and inconsistent (PubMed 16305005).
- 03In orthodontic patients the two methods land close together: in a 30-patient randomised trial over 14 days, water jet flossing held a non-significant 6.79% median advantage in plaque removal over interdental floss (PubMed 38678246).
- 04Maintenance runs on a schedule: replace tips every three to six months, clean the reservoir weekly, and clear mineral build-up with diluted white vinegar about once a month.
- 05Children from age six can use one under supervision, on a low pressure setting and with a child-sized or orthodontic tip.
What a Water Flosser Does
A Waterpik is a brand of water flosser, a device that cleans between the teeth and along the gumline with a thin pulsating stream of water. It is used alongside the toothbrush, in the place of string floss or next to it. The stream loosens food debris and soft plaque from spaces the brush does not reach, including the edge where the gum meets the tooth, which is why water flossers are often recommended in periodontal care.
The device has only a few parts. The reservoir holds the water. The flosser tip is the nozzle the water comes out of, and it clicks into a handle that carries the on and off switch. A pressure control sets how strong the stream is, and a tip eject button releases the tip for cleaning or replacement. Countertop units have a larger reservoir and a hose to the handle; cordless units carry a smaller reservoir in the handle and are easier to take when travelling.
People who find string floss hard to use often manage a water flosser more easily, because it needs less finger movement and no threading between tight contacts. It is also easier to guide around brackets, bridges and implant crowns, where floss catches. The first few sessions may cause some bleeding if the gums were already irritated; this usually settles with daily cleaning, and bleeding that continues after the first weeks is worth having checked.
Setting Up Before the First Use
Setting the unit up correctly prevents most first-week problems. Fill the reservoir with warm water. Cold water can trigger sensitivity and makes many people flinch, which is when the tip slips and water sprays across the bathroom.
Choose the tip that matches your mouth. A classic jet tip suits most people with natural teeth. An orthodontic tip has a small brush at the end for cleaning around brackets and wires. A plaque seeker tip has thin bristles that help around implants, crowns and bridges. A pocket tip with a soft rubber end places water gently into deeper gum pockets and is typically used after a dentist has advised it.
Set the pressure to its lowest step for the first sessions. The cleaning depends on where the tip is placed, and a low setting gives you time to learn the angle and the pace without discomfort. You can raise it gradually over the following days once the gums are used to the stream. In the trial that tested water flossing against string floss, subjects used the water jet on a medium setting (PubMed 16305005), so there is no need to push the unit to its maximum.
Finally, lean over the sink before you begin. Most of the water should run out of your mouth into the basin, and leaning forward lets it do that without spilling onto your clothes.
Technique Step by Step
The order of the steps matters more than the pressure setting. Put the tip in your mouth first, close your lips loosely around it, and only then switch the unit on. Switching on before the tip is inside causes almost all of the splashing.
Aim the tip at the gumline at about 90 degrees to the tooth. Start with the back teeth and work toward the front, following the gumline along the outside of each tooth and then along the inside. Pause briefly in each space between two teeth so that the stream can flush it before moving on. Keep the tip close to the gum without pressing it into the tissue; held too far away, it sends the water across the tooth surface without flushing the gap.
Let the water drain from your mouth into the sink as you go. Keeping your lips slightly closed allows it to run out without spraying, and breathing through your nose makes the session easier. If water collects, pause the unit, let it drain and continue.
When every tooth has been covered on the outside and inside of both jaws, switch the unit off before taking the tip out of your mouth. Empty any water left in the reservoir, rinse the tip and let the parts dry. After the first week the sequence becomes routine.
Timing, Frequency and Order with Brushing
Once a day is the usual routine, and a full session takes about one to two minutes, roughly the time most units need to empty the reservoir. People with braces or gum disease are sometimes advised by their dentist to use it twice a day for a period, but for most people a steady daily habit is the goal.
Use the water flosser before brushing. Irrigation loosens debris between the teeth and along the gumline first, so the fluoride toothpaste that follows lands on cleaner surfaces. If you brush first, the water rinses away part of the toothpaste you have just applied.
The routine used in the research gives a practical reference point. In a 28-day randomised trial, subjects brushed for a timed two minutes twice a day and used the water jet once a day with 500 ml of lukewarm water on a medium setting (PubMed 16305005). Nothing about the settings or the volume was extreme; the benefit came from a steady daily habit.
Evening is a convenient time for the session because it clears the food of the day before the overnight period, when saliva flow is low. The orthodontic trial on water flossing also asked patients to use it once daily at night (PubMed 38678246). Any time of day works if you can keep it every day.
What the Trials Show Against String Floss
For bleeding gums the trial data favours water flossing; for plaque the results are more mixed. In a randomised trial designed for 105 subjects over 28 days, both groups that added a water jet to manual or sonic brushing reduced the bleeding index significantly more than the group using brushing and string floss, at both day 14 and day 28 (PubMed 16305005).
The other measures were less uniform. Gum inflammation on the outer surfaces fell more in both water jet groups at day 14, while on the inner surfaces there was no significant difference at that point (PubMed 16305005). Plaque showed only some significant differences, mostly in favour of the group combining a sonic brush with the water jet, and at day 28 the manual brush with water jet group no longer differed from the floss group on outer surface plaque reduction (PubMed 16305005).
In people with fixed braces the two methods land close together. In a randomised trial of 30 orthodontic patients over 14 days, both water jet flossing and interdental flossing reduced plaque and gum bleeding from the start of the study (PubMed 38678246). The water jet group showed a non-significant median advantage of 6.79% in plaque removal and 5.21% in bleeding reduction (PubMed 38678246).
Taken together, a water flosser is a reasonable alternative to string floss for most people, with the clearest effect on bleeding. String floss still has a place for tight contacts, and the method you will use every day is the one that helps.
Braces, Implants and Gum Disease
Water flossers are particularly useful where string floss is awkward. In orthodontic patients, food and plaque collect around brackets, wires and elastics, and threading floss under every wire takes time. An orthodontic tip with a small brush cleans around each bracket as the water flows, and the trial in patients with braces found no significant difference between the water jet and interdental floss over two weeks (PubMed 38678246).
For people with dental implants, crowns and bridges, a plaque seeker tip helps reach the edges of the restoration and the area under a bridge, where plaque builds up if cleaning is irregular. The gum around an implant needs the same daily attention as the gum around a natural tooth.
In gum disease, a pocket tip places a gentle stream into deeper pockets between the tooth and the gum. This supports home care alongside professional treatment and does not replace deep cleaning at the clinic. Pressure should stay low, and any change in bleeding or gum sensitivity should be reported at the next visit.
Children from about age six can use a water flosser under supervision, on a low pressure setting and with a child-sized or orthodontic tip. It helps children with braces or retainers who struggle with floss, and an adult should stay nearby until the child can control the tip and the switch.
Cleaning the Unit, Replacing Tips and Adding Mouthwash
Maintenance runs on a simple schedule. Replace the tips every three to six months, and sooner if a tip is frayed, clogged or discoloured.
Clean the tip and reservoir weekly with warm soapy water. About once a month, run diluted white vinegar through the unit to clear mineral build-up from hard water, then run a reservoir of plain water through it to rinse the vinegar out. Mineral deposits narrow the openings in the tip and handle, which weakens the stream.
Store the unit dry. Empty the reservoir after each use and leave the reservoir and tip open to the air between sessions. A reservoir that stays damp and closed lets bacteria grow in the device itself.
An alcohol-free mouthwash can be added to the reservoir when a dentist has suggested it, for example for bad breath or during treatment of gum inflammation. Strong essential oil rinses should not go into the unit without professional advice, and the reservoir should be rinsed with plain water afterwards so that residue does not build up in the hose and handle. If the gums keep bleeding after several weeks of daily use, have them examined; bleeding that persists despite good cleaning can point to gum disease that needs treatment.
Let’s plan the right treatment together.
Free Assessment→- 1.Barnes CM, Russell CM, Reinhardt RA, Payne JB, Lyle DM. Comparison of irrigation to floss as an adjunct to tooth brushing: effect on bleeding, gingivitis, and supragingival plaque. J Clin Dent 2005;16:71-7. PubMed 16305005
- 2.AlMoharib HS, Alqasem A, Almusfer G, Aldosari MA, Almadhoon HW. The effectiveness of water jet flossing and interdental flossing for oral hygiene in orthodontic patients with fixed appliances: a randomized clinical trial. BMC Oral Health 2024;24:498. PubMed 38678246