
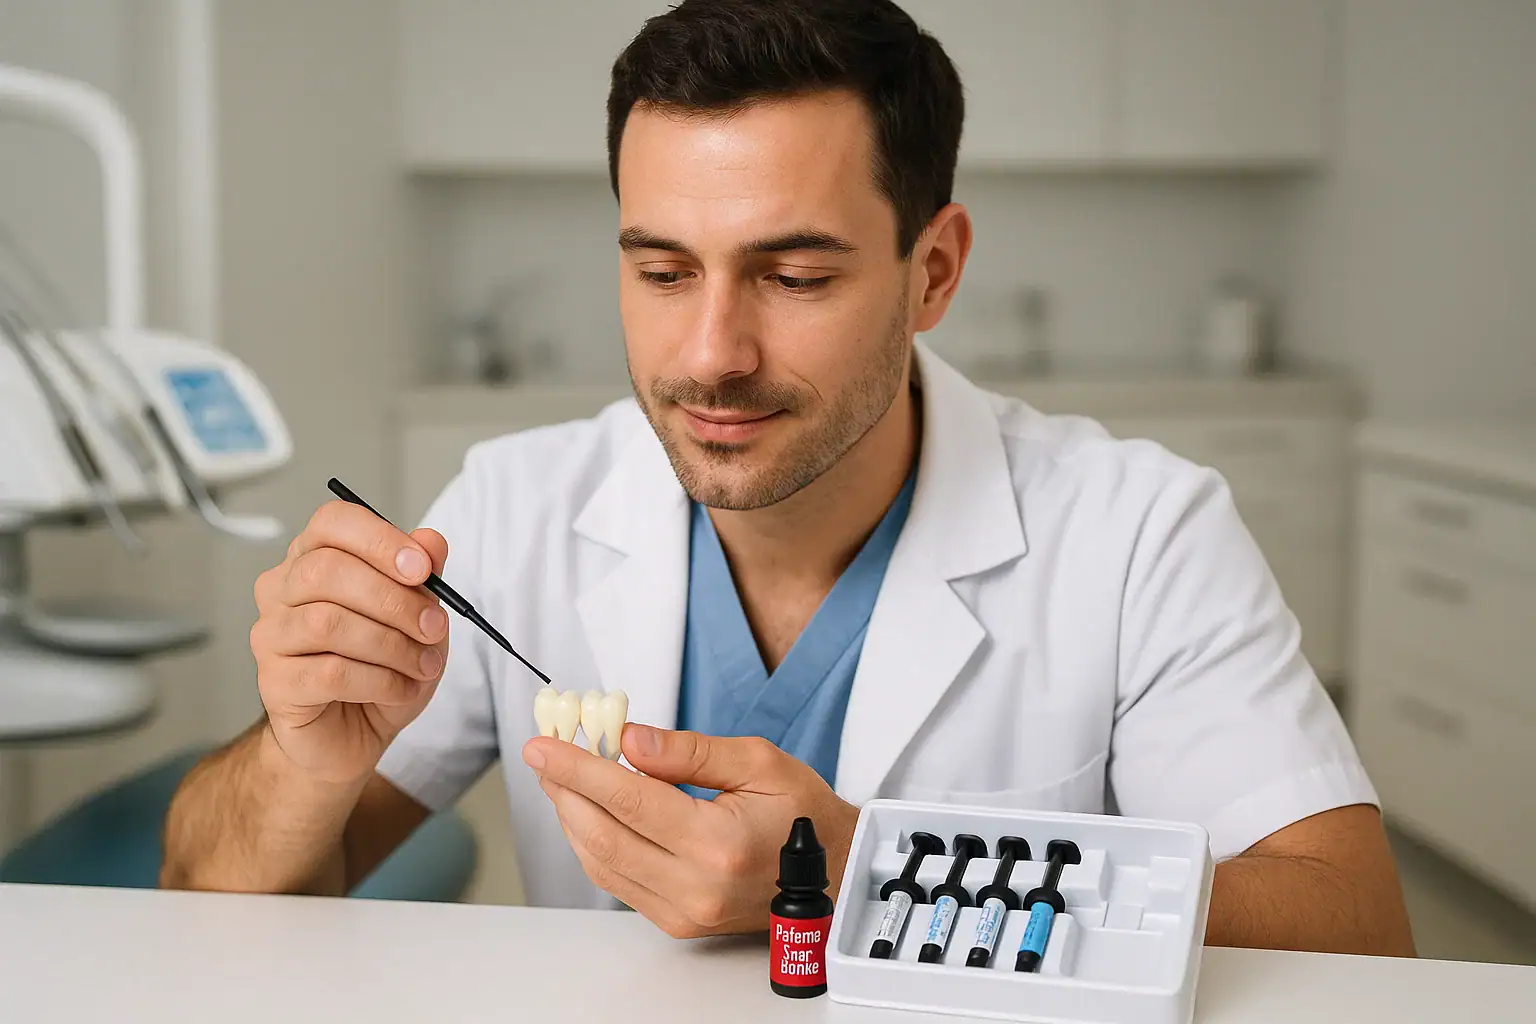
A dent bond is the adhesive interface that joins composite resin to enamel and dentin through a hybrid layer: acid etching exposes the collagen network, primer infiltrates it, and low-viscosity bonding resin polymerises inside it while forming resin tags in the dentinal tubules. Strategy changes the outcome. In a meta-analysis of 20 clinical trials of universal adhesives on non-carious cervical lesions, etch-and-rinse or selective-enamel-etch application carried a lower risk of retention loss than self-etch at 12 months (RR 0.22) and at 18 to 24 months (RR 0.32), while postoperative sensitivity was more likely with etch-and-rinse (RR 2.12) (PubMed 34481667).
- 01Two substrates, two problems: enamel is roughly 96% mineralised hydroxyapatite and etches predictably, while dentin is about 70% mineralised, permeated by fluid-filled tubules, and is the technique-sensitive half of the bond.
- 02Universal adhesives retained better in etch-and-rinse or selective-enamel-etch mode: the risk ratio for retention loss against self-etch was 0.22 at 12 months and 0.32 at 18 to 24 months, from 20 trials with 14 pooled quantitatively (PubMed 34481667).
- 03The trade-off is sensitivity, not durability alone: postoperative sensitivity occurred more often with etch-and-rinse than self-etch, RR 2.12 (95% CI 1.23 to 3.64), at moderate certainty (PubMed 34481667).
- 04The moist dentin rule is weaker in trials than in teaching: across five split-mouth randomised trials with 195 patients and up to five years of follow-up, dry and wet bonding showed no difference in retention, risk ratio 1.0 (95% CI 0.42 to 2.38) at 60 months (PubMed 39613137).
- 05The chemistry has a named workhorse: 10-MDP bonds ionically to calcium in hydroxyapatite, and composite is placed in increments of 2 mm or less so that polymerisation shrinkage stress does not pull the margins open.
Restorative dentistry has undergone a profound paradigm shift, moving decisively away from the age of mechanical retention required for materials like amalgam. Today, the focus is on minimally invasive, adhesive techniques that prioritize the preservation of natural tooth structure. At the heart of this revolution lies the "dent bond" a sophisticated clinical process involving both micro mechanical and chemical adhesion to durably bond restorative materials, such as composite resin, directly to the enamel and dentin of a tooth. Achieving this reliably requires a systematic approach, which is why comprehensive systems like the prime dent bonding kit have become indispensable in modern practices.
/ The Science of the Dent Bond: Understanding the Tooth-Adhesive Interface
Achieving a durable "dent bond" is a testament to sophisticated chemical engineering, as it requires bonding to two vastly different substrates: enamel and dentin. Enamel, being approximately 96% mineralized hydroxyapatite, provides a predictable and high-energy surface that is ideal for adhesion. Dentin, however, presents a significant substrate challenge. It is only about 70% mineralized, with the remainder being a complex mix of organic material (primarily collagen) and water, all permeated by millions of fluid-filled dentinal tubules. This inherently wet and dynamic nature makes bonding to dentin a far more delicate and technique sensitive procedure.
The Key to Success: The Hybrid Layer
The foundation of modern adhesive dentistry is the creation of a "hybrid layer." This is not merely a layer of glue on the tooth; rather, it is a micro mechanical, interlocking zone where the adhesive resin and the tooth’s own collagen network become one. This remarkable interface is formed through a multi-step process. First, an acid etchant demineralizes the superficial dentin, exposing a web of collagen fibrils. Following this, a hydrophilic primer and then the prime dent bonding resin are applied. This low-viscosity resin infiltrates the exposed collagen network, enveloping the fibrils. Upon light curing, the resin polymerizes, creating the tough, acid-resistant hybrid layer. Simultaneously, the resin penetrates the open dentinal tubules, forming "resin tags" that provide crucial secondary micro-mechanical retention.
/ Etch-and-Rinse and Self-Etch Adhesion
Etch-and-Rinse vs. Self-Etch
Clinicians primarily use two adhesive strategies to achieve this bond. The classic "total-etch" or "etch-and-rinse" technique utilizes a separate phosphoric acid step to etch both enamel and dentin, which is then thoroughly rinsed off before the primer and adhesive are applied. This method is renowned for creating deep etch patterns in enamel. In contrast, "self-etch" systems combine the etchant and primer into one acidic solution. This milder approach modifies the smear layer instead of completely removing it and simultaneously demineralizes and primes the dentin, reducing the risk of over-etching and post-operative sensitivity.
The Importance of Chemical Adhesion
Beyond micro-mechanical interlocking, the most advanced modern adhesives offer a true chemical bond. They incorporate specialized functional monomers, with 10-MDP (10-methacryloyloxydecyl dihydrogen phosphate) being the gold standard. This remarkable molecule has a phosphate group that can ionically bond to the calcium in the hydroxyapatite of the tooth structure, creating a stable, water-resistant, and durable chemical link. This dual approach of both micro-mechanical and chemical adhesion is what gives modern dentin bonding its exceptional strength and longevity.
/ The Clinician's Toolkit: Etchant and Primer
Predictable and successful adhesive dentistry relies on a systematic approach, which is why complete, professionally curated systems are the cornerstone of the modern restorative practice. A system like the prime dent bonding kit is designed for success, providing all the essential chemical agents needed to create a robust bond between the tooth and the restoration. Let's unpack the critical components found within a typical total-etch bonding kit.
Component 1: The Etchant
The first bottle in the sequence contains the etchant, which is typically a thixotropic phosphoric acid gel with a concentration of 35-37%. Its role is twofold and substrate-specific. When applied to enamel, the etchant creates significant microporosities, dramatically increasing the surface area and energy for a powerful micro-mechanical bond. On dentin, its function is more delicate: it removes the smear layer, a film of grinding debris from tooth preparation, and demineralizes the top few microns of the dentin surface. This exposes the underlying network of collagen fibrils, preparing the scaffold for resin infiltration.
/ The Clinician's Toolkit: Adhesive Resin and Essential Tools
Component 2: The Primer
Perhaps the most sophisticated component, the primer is a solution containing hydrophilic (water-loving) monomers suspended in a volatile solvent, such as ethanol or acetone. After etching and rinsing, the dentin's collagen network remains moist. The primer’s critical role is to penetrate this wet environment. The solvent displaces the water, and the hydrophilic monomers infiltrate the collagen network, transforming the surface from a moist, low-energy state to a receptive, monomer-saturated one, ready to accept the hydrophobic adhesive.
Component 3: The Adhesive ( Prime Dent Bonding Resin )
The final chemical agent is the adhesive itself, such as the prime dent bonding resin. This is a low-viscosity, typically unfilled, hydrophobic (water-fearing) resin. Its primary function is to act as a linking agent. It chemically bonds to the underlying primer-saturated collagen and copolymerizes with the subsequently placed composite restorative material. When light-cured, this resin forms the bulk of the essential hybrid layer, creating a durable, sealed interface.
Essential External Tools
While the kit provides the chemistry, the clinician provides the control. The procedure is impossible without essential external tools, including: a properly calibrated dental curing light to polymerize the resin, disposable micro-brushes for precise application, a reliable air/water syringe for controlled rinsing and drying, and critically, proper isolation materials like a rubber dam to guarantee a contaminant-free working field.
/ Dental Bonding Assessment and Preparation
This section explains what bonding means in a dental context. The clinical application of a "dent bond" is a meticulous, multi-step process where precision at every stage dictates the final outcome. The following is a step-by-step guide using a classic total-etch (etch-and-rinse) technique.
Step 1: Patient Assessment and Isolation
Before any bonding can begin, a thorough assessment of the tooth and clinical case is performed. Once deemed appropriate for an adhesive restoration, the paramount step is isolation. Moisture, whether from saliva or gingival crevicular fluid, is the nemesis of a durable bond. The gold standard for achieving absolute isolation is the rubber dam, which provides a clean, dry, and accessible operating field, dramatically increasing the predictability and longevity of the restoration.
Step 2: Tooth Preparation
The next step is to prepare the "dent" itself. Modern adhesive dentistry follows the principles of minimally invasive cavity preparation. This means using fine burs to selectively remove only the carious or structurally compromised tooth structure while preserving as much healthy enamel and dentin as possible. To enhance the bond to enamel, the cavosurface margins (the edges of the preparation) are often beveled. This exposes the enamel rod ends, which are more receptive to etching and create a more aesthetic and smooth transition from the restoration to the tooth.
/ Clinical Protocol: Etching and Moist Dentin Control
Step 3: The Etching Stage (Using a Total-Etch Approach)
With the tooth prepared and isolated, the conditioning process begins. A 35-37% phosphoric acid etchant is carefully applied. It is placed first on the enamel margins and left for 15-20 seconds. Then, the etchant is applied to the dentin for no more than 15 seconds. Exceeding this time on dentin can demineralize it too deeply, leading to a weaker bond and potential sensitivity. Following the prescribed time, the etchant is thoroughly rinsed with an air-water spray for at least 15-20 seconds to ensure all the acid gel is completely removed.
Step 4: Achieving "Moist Dentin"
This is arguably the most technique-sensitive step in the entire protocol. After rinsing, the tooth surface must not be over-dried. Aggressively blasting the dentin with air will cause its delicate, exposed collagen network to collapse into a dense, impermeable mat that the adhesive cannot penetrate. Instead, the surface should be gently air-dried, leaving it visibly glistening but without any pooled water. This ideal "moist dentin" state keeps the collagen fibrils upright and separated, ready for primer infiltration.
/ Resin Application and Final Bonding Steps
Step 5: Applying Primer and Prime Dent Bonding Resin
Using a disposable micro-brush, the primer is now applied to the moist dentin. It should be applied actively and with a gentle scrubbing motion for 15-20 seconds. This ensures the hydrophilic monomers penetrate the entire depth of the exposed collagen. Next, a gentle stream of air is used to evaporate the volatile solvent (ethanol or acetone) from the primer, leaving the functional monomers behind. Immediately following this, a thin, even layer of the prime dent bonding resin is applied over the primed dentin and etched enamel. This layer should be uniform and not pooled in any areas.
Step 6: Light Curing
The adhesive layer is now ready for polymerization. A properly calibrated dental curing light is positioned as close as possible to the tooth surface without touching it, and the resin is cured for the manufacturer's recommended time (typically 10-20 seconds). This step solidifies the adhesive, creating the foundational hybrid layer and locking the resin tags into the dentinal tubules.
Step 7: Building the Restoration
With the bond secured, the composite resin is placed. To minimize the effects of polymerization shrinkage stress, the composite is applied in small increments, typically 2mm or less. Each increment is carefully sculpted to build up the tooth’s anatomy and then individually light-cured before the next layer is added. This incremental technique reduces the overall stress on the bonded interface, preventing marginal gaps and ensuring a better seal.
Step 8: Finishing and Polishing
Once the final layer is cured, the restoration is nearly complete. A sequence of finishing burs and discs is used to precisely contour the restoration, define the final anatomy, and adjust the occlusion. Finally, a series of polishing points, cups, and pastes are used to create a high-luster, smooth surface. This provides an aesthetic result and also creates a restoration that is more resistant to staining and plaque accumulation over the long term.
/ Troubleshooting Dental Bonding Complications
Even with excellent materials, the success of a "dent bond" hinges entirely on meticulous clinical technique. Understanding how to prevent common problems is key to ensuring your restorations are comfortable, durable, and long-lasting. Here are some of the most frequent challenges and the best practices to avoid them.
Post-Operative Sensitivity
Post-operative sensitivity is a common patient complaint that can almost always be traced back to a procedural issue. The primary causes include over-etching the dentin beyond the recommended 15 seconds, which demineralizes it too deeply for the adhesive to penetrate, or over-drying the dentin after rinsing, which causes the supportive collagen network to collapse. Both errors prevent the formation of a complete hybrid layer, leaving open dentinal tubules that transmit fluid shifts and cause pain. The best preventative measure is strict adherence to timing protocols and consciously aiming for a "moist bonding" surface that glistens but is not overly wet.
Microleakage and Debonding
The catastrophic failures of microleakage (a microscopic gap between the tooth and restoration) and complete debonding are typically linked to fundamental procedural errors. The number one culprit is moisture contamination from saliva or blood, which is why a rubber dam is the gold standard for isolation. Other frequent causes include insufficient curing time or using a poorly maintained curing light, which results in a soft, weak adhesive layer. Finally, improper adhesive application, such as not scrubbing the primer in or failing to apply an even layer of bonding resin, can create voids and weak spots that are destined to fail.
/ Managing Polymerization Shrinkage and Clinical Principles
Managing Polymerization Shrinkage
It is an unavoidable physical property that all composite resins shrink as they cure. This polymerization shrinkage creates stress at the bonded margins of the restoration. If this stress is too high, it can pull away from the tooth wall, leading to marginal gaps, microleakage, and visible "white lines" from micro-fractures in the enamel. The most effective way to mitigate this stress is by placing the composite using an incremental layering technique, applying and curing the material in small layers of 2mm or less. This reduces the volume of material shrinking at one time. Furthermore, using a high-quality, properly cured bonding agent creates a strong, elastic interface that can better absorb this stress, maintaining the marginal seal.
The modern "dent bond" represents a pinnacle of clinical achievement, enabling restorations that are as durable as they are beautiful. As we've explored, its success is not a matter of chance but a direct result of mastering three fundamental pillars. These are: the necessity of absolute moisture control, preferably with a rubber dam; a deep understanding of the materials and the specific role of each component within a system like the prime dent bonding kit; and finally, an unwavering commitment to a meticulous, step-by-step clinical technique where no detail is overlooked.
Mastering this adhesive protocol empowers every clinician with the ability to move beyond outdated mechanical principles and provide patients with truly conservative care. It is the key to delivering aesthetic, durable restorations that preserve natural tooth structure and stand the test of time. Ultimately, adhesive dentistry is both an art and a science. A steadfast commitment to its principles does more than just ensure the success of a single procedure, it fundamentally elevates the standard of patient care you provide every day.
Let’s plan the right treatment together.
Free Assessment→- 1.Josic U, Maravic T, Mazzitelli C, Radovic I, Jacimovic J, Del Bianco F, et al. Is clinical behavior of composite restorations placed in non-carious cervical lesions influenced by the application mode of universal adhesives? A systematic review and meta-analysis. Dent Mater 2021;37:e503-e521. PubMed 34481667
- 2.Forville H, Wendlinger M, Cochinski GD, Favoreto MW, Wambier LM, Chibinski AC, et al. Re-evaluating the role of moist dentin of adhesive systems used in the etch-and-rinse bonding strategy. A systematic review and meta-analysis. J Dent 2025;152:105495. PubMed 39613137